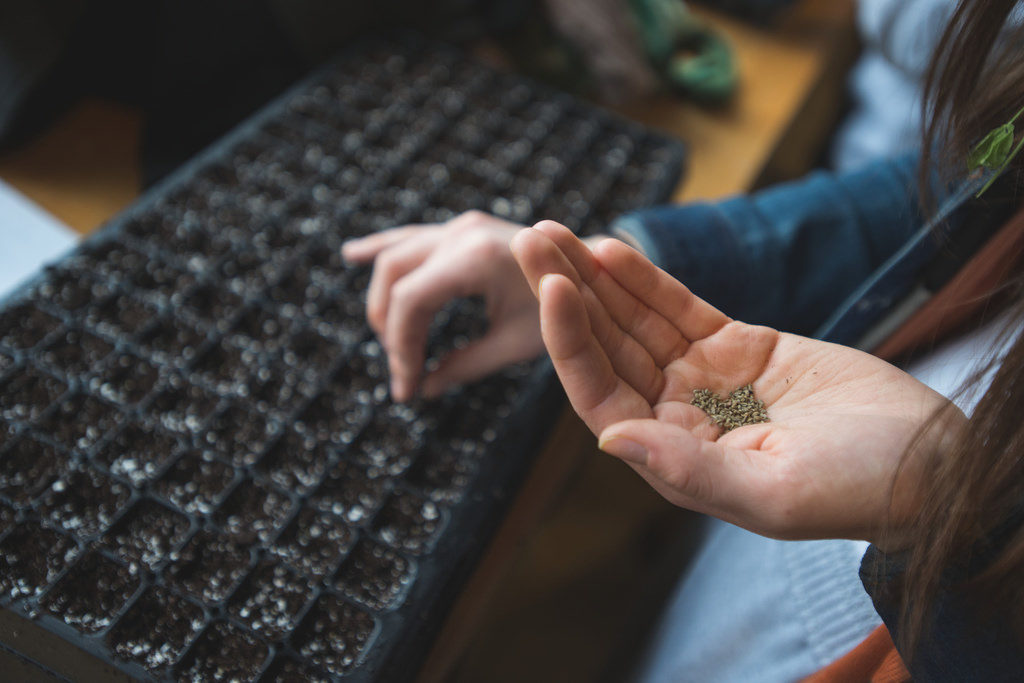
When To do your Seed Starting Indoors?
Seed packages usually identify how many weeks ahead of the average last frost date to start the seeds. Count back from that frost date for each type of seed.
LONDON ONTARIO – AVERAGE LAST SPRING FROST is MAY 10th
Start hardening off for 1-2 weeks after this date and keep a close eye on the night temperatures. May 24 is a safer date for actually planting out.
Here’s a chart listing many commonly grown vegetables, flowers, and herbs. Use this chart to identify when to plant your seeds. It is based on the recommended # of weeks prior to Frost Free Date for Zone 5/6. Recommended Planting Dates and Seed Starting Basics
Many things can be direct-seeded into planting beds rather than starting indoors, for example:
- March (as soon as soil can be worked): Asparagus, Carrots, Onion sets, Radish, Turnip, Spinach, Peas, Parsnip
- April: Beets, Brussel Sprouts, Swiss Chard, Leeks, Lettuce, Potatoes
- May: Beans, Pumpkin, Squash, Corn, Watermelon
Why do your own Seed Starting?
- Selection, selection, selection. Nurseries tend to stock only a few common varieties.
- Earlier harvests and blooms. You can jump-start the season and enjoy fresh food and flowers sooner.
- More for less. A flat of 36 petunias costs at least $12. A packet of 100 seeds may cost ~$2.
- Organic guaranteed. By growing your own plants, you don’t need to worry about chemicals.
Top 10 Tips for Starting Seeds
1.Choose Wisely – Research in the winter to choose the right seeds and work out details of timing and transplanting. Use catalogs that specialize in plants for your region.
- Decide between hybrids and open-pollinated cultivars. Hybrids may produce earlier harvests and higher yields, but open-pollinated cultivars may taste better, produce longer and cost less.
- Avoid seeds treated with a synthetic chemical fungicide. When ordering, specify untreated seeds.
- Choose cultivars for size, habit, and tolerance of your soil conditions.
- Some sure bets for home germination: Edibles – basil, broccoli, brussel sprouts, cabbage, cauliflower, chives, leeks, lettuce, onions, peppers, and tomatoes. Annuals – alyssum, cosmos, marigolds, and zinnias. Perennials – Shasta daisies, columbines, and hollyhocks.
2.Get the timing down – Calculate when to sow and transplant using area frost dates as a guideline.
3.Gather CLEAN containers – anything 2-3 inches deep with holes for drainage will do. Clean by washing in hot soapy water, and rinsing with a 10% solution of white vinegar or household bleach. Some even use their dishwashers!
4.Use seed-starter mix (NOT potting soil) or make your own (equal parts of perlite, vermiculite, and peat with a 1/4 teaspoon of lime for each ‘armful’ to neutralize the acidity of the peat).
5.Sow carefully – Sow more finicky transplants into large containers or directly into the garden after frost risk is passed (e.g. lettuce, melons, cucumbers). Moisten your medium before sowing. Drop seeds onto the surface, spacing as evenly as possible. Cover the seeds to a depth mentioned on the packet or about three times the thickness of the seeds. Some should not be covered at all because they need light to germinate. Top it off with lightly sprinkled milled sphagnum moss, a natural fungicide, to protect against damping-off, a fungal disease that rots seeds and seedlings.
6.Keep seeds cozy and moist – Cover flats with plastic wrap or glass to keep the environment humid and place them near a heat vent or on a heat mat made for seed starting. Most seeds germinate well at about 21-24 C (70-75 F). Mist with a spray bottle or set the trays into shallow water so the mix wicks up the moisture.
7.Provide LOTS of light – After germination, uncover and move the containers to a bright spot—ideally 2 inches beneath fluorescent lights (NOT incandescent). Rotate seedlings at the edges into the middle every few days. Keep the tubes clean to maximize the light available. Provide 12-16 hours of light per day.
8.Treat seedlings to food and cooler temperatures 10-15 C (50-60 F) – Begin to fertilize with a half-strength solution every week or two of fish or seaweed fertilizer, compost tea, or one of the liquid organic fertilizers specially formulated for seedlings. Do this AFTER they get their first true leaves which emerge after the little, round cotyledon leaves.
9.Give them room – to avoid becoming root-bound or weak growth, thin seedlings and repot into larger containers with a mix that includes compost. Gently use a narrow fork or flat stick to lift the seedlings and handle only leaves or roots to avoid damaging the fragile stems.
10.Toughen them up – Lightly brush seedlings with your hand often each day to help them grow stocky and strong or set up a small fan to gently, continuously blow on them. Start acclimatizing them outdoors (hardening off) 1-2 weeks before the plants are to go into the garden. On a warm spring day, place containers in a shaded, protected place, such as a porch, for a few hours. Each day, unless the weather is horrible, gradually increase the exposure to sunshine.
Quick and Easy YouTube videos to inspire you


About The Author: Armstrong
As an author and editor, Linda directs her lifelong love of nature and plants to concerns about our environment and how we can do better. In addition to decades of gardening experience, and training as a master gardener, Linda focuses on learning from leading science-based educators and writers, and in the process finds that she uncovers many gardening myths.
More posts by Armstrong